Thursday, March 29, 2012
Quinoa Black Bean Burgers
As much as I love cooking, I sometimes fall down a rabbit hole and arrive in The Land of No Ideas. I don't really like it there. It's cold, uncomfortable, and I spend waaayy too much time trying to come up with new dinner ideas. As much as I enjoy experimenting, I fall into cooking patterns just as much as anyone else. And you can only make (and eat) a frittata so many times before you never want to see another egg in your life. So when I stumbled across a bag of tri-colored quinoa, I couldn't resist buying it. I don't use quinoa very often, so it seemed like it would be fun to work with a different grain. One of the suggestions on the back of the bag was to make veggie burgers, which just intriguing enough.
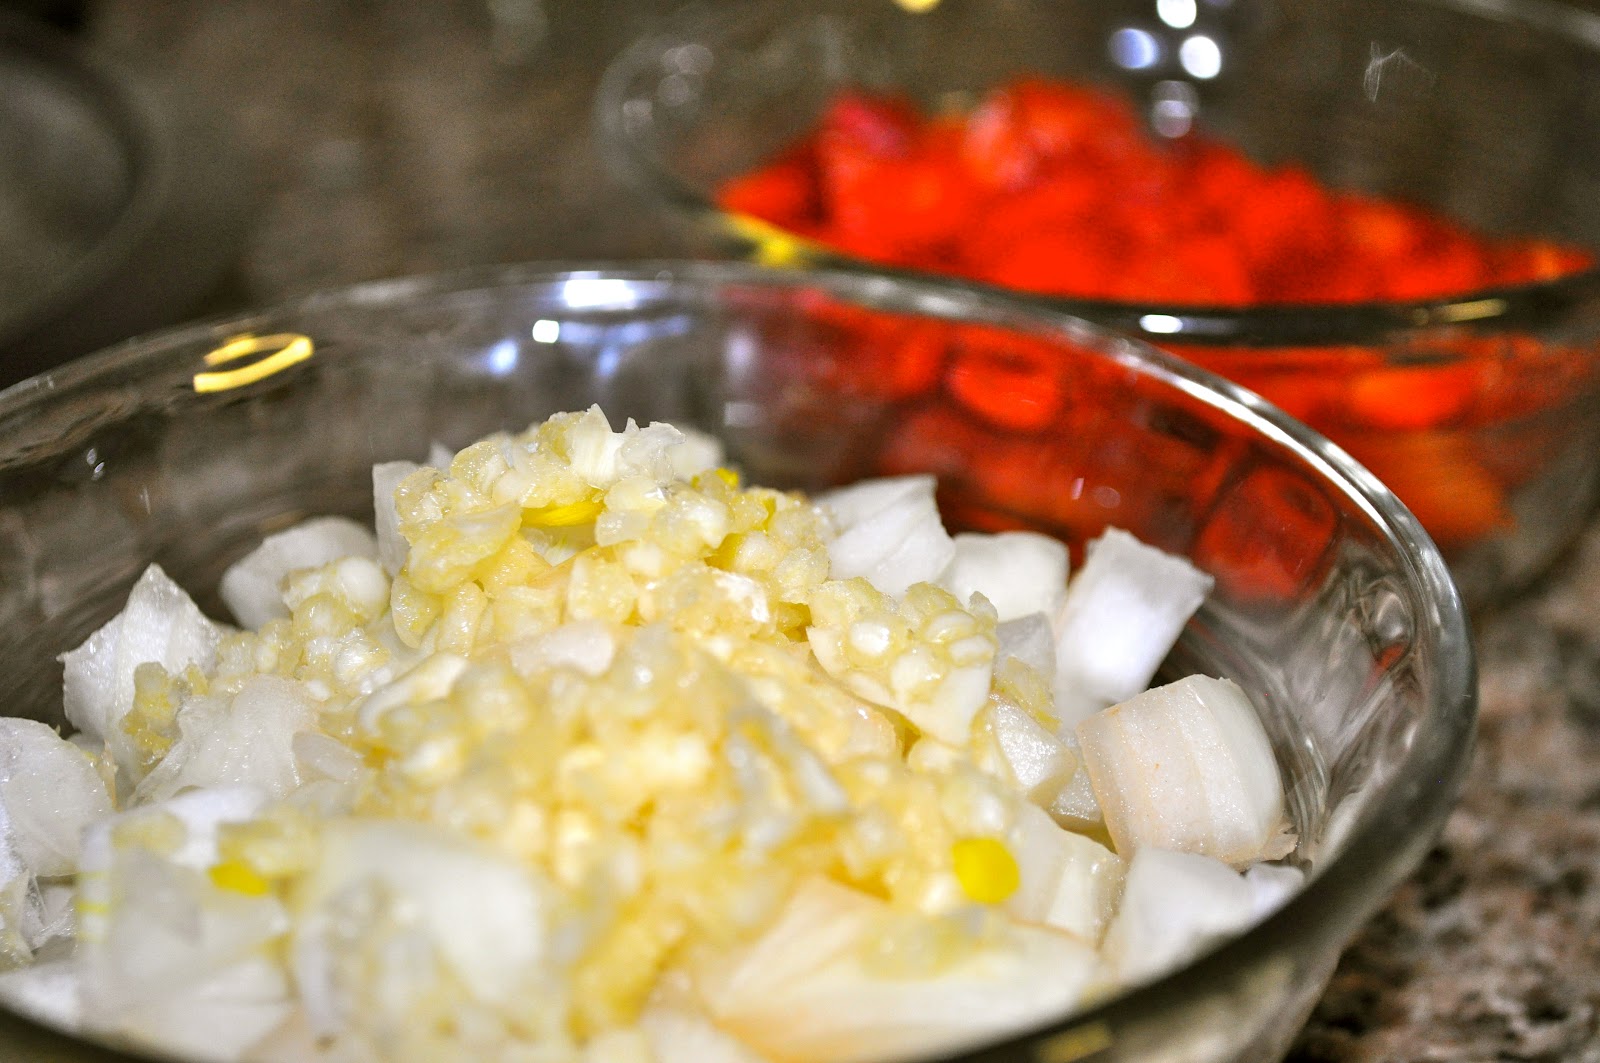
If you've ever tried to make (or eat) a veggie burger, then you know that there are TONS of different ones out there. Vegetable, soy, rice, millet, egg, grain, bean, mushroom... The list goes on and on. Having eaten veggie burgers my whole life, I can guarantee that they have improved in flavor over the last couple of decades. When I was a kid, they were pretty awful, but now? Now, most of them are quite delicious (although there is always room for improvement).
And as easy as it is to just buy a package of frozen burgers and cook them, there is a certain appeal in making your own because there is so much more versatility. You can add (or eliminate) any ingredient you want. So I encourage to to go ahead and try these out. They are simple to make and they are begging to be adapted. You could use different vegetables, add spices, or throw some curry powder in the mix. Whatever you decide to throw in, I'm sure it will taste fabulous. The only thing is, you'll have to invite me to dinner.
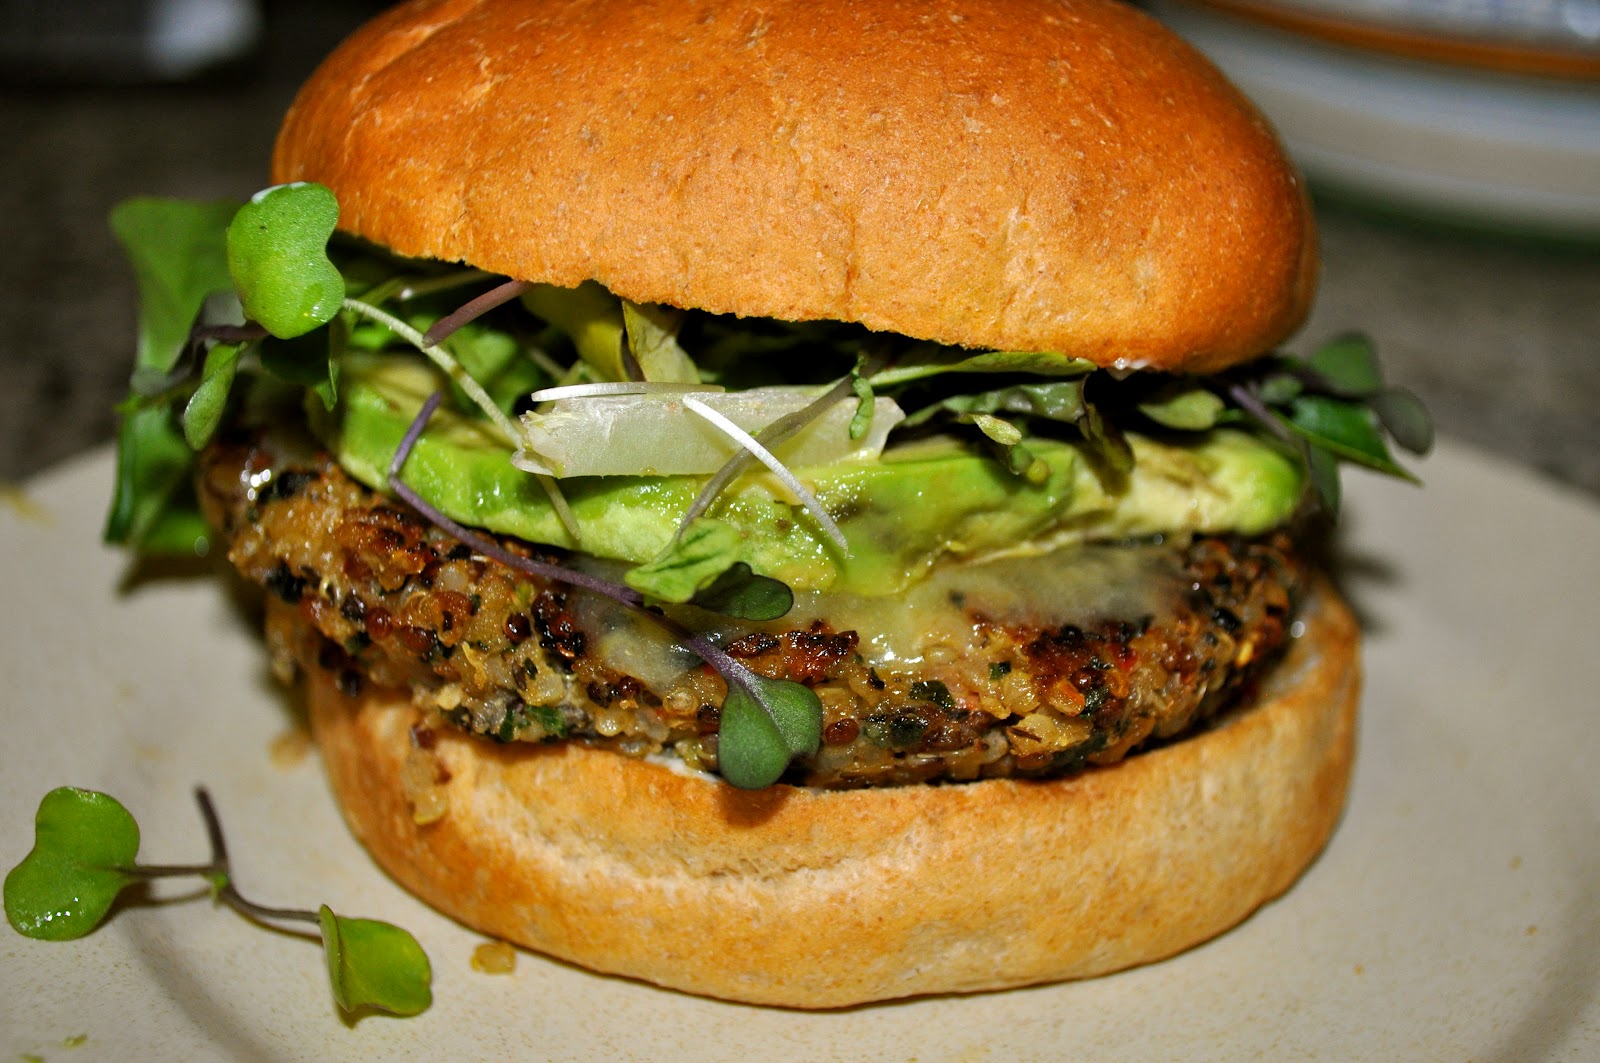
Quinoa Black Bean Burgers
Serves 6-8
Note: while veggie burgers seem inherently simple, there is something incredibly difficult about making them. They often crumble and fall apart, making the cooking rather perilous. Upon experimenting, I have found that many cook better if you add a little water to the pan, cover, and allow them to steam for a couple of minutes before browning/frying them. It allows the burgers cook through and become more stable before the browning.
Olive oil
1 medium red bell pepper, diced
1 small onion, diced small
2 cloves garlic, minced
2 kale leaves, sliced thin
1/2 cup fresh or frozen corn
3 cups cooked quinoa
1 can black beans, drained
1/4 to 1/2 cup sharp cheddar cheese
1 egg, beaten
1/2 cups dried bread crumbs
Salt and pepper to taste
Heat olive oil in a skillet and saute peppers and onions 3-5 minutes. Add garlic, corn, and sliced kale and continue to cook until soft, 2-3 minutes more. Remove from heat and combine in a food processor with the black beans, and puree until fine. In a large bowl, mix black bean mixture, quinoa, beaten egg, cheese, bread crumbs, salt, and pepper.
To cook patties, form and let chill in the freezer for 5-10 minutes. [Also, see note above] In the meantime, heat skilled with oil and fry patties until browned, 3-4 minutes on each side. Serve on a bun with your favorite toppings.
Wednesday, March 21, 2012
Almond Tuiles
When I was a little girl, my mom and I would walk down to a local French bakery. It was always a fun trip, where I would look wonderingly at the breads, cookies, and tarts. They always looked so perfect, so deliberate. The beautiful curls of chocolate, the delicately displayed fruit, and the perfectly curved almond tuiles. We would walk home with a beautiful little pink box full of delightful goodies, and them share them over a cup of tea and juice (in a teacup, of course).
This has always been a wonderful memory, but it had been years since I tried an almond tuile. So when I stumbled across this recipe, I was excited to see if it would live up to my expectations. And I have to say, these were surprisingly delicious! Even better - they are incredibly easy.
Considering how pretentious and almond tuile looks, you would expect there to be a corresponding degree of difficulty in the execution of said cookie. But no. These are incredibly simple (as in: one bowl, one whisk, a few ingredients. Done). The batter is just a tiny bit awkward, but if you have a little faith and push through, it is surprisingly forgiving, resulting in consistently beautiful cookies.
And you are welcome to leave them flat. I just can't resist the traditional, curved, tile-shaped cookie. After all, foods always taste better when in funny shapes. Everyone knows that. Look at all the different shapes of pasta, for goodness sake. So curve away. You don't really need any special equipment. Just a rolling pin. And who doesn't have a rolling pin?
Almond Tuiles
Adapted from Williams-Sonoma Essentials of Baking
1/2 cup cake flour
2/3 cup confectioners' sugar
2 large egg whites
1 teaspoon vanilla extract
1 teaspoon almond extract
1/4 cup butter, melted and cooled slightly
1/2 cup sliced (flaked) almonds
Position rack in the middle of the oven and preheat to 350 degrees F. Line baking sheets with parchment paper or a silicone baking mat.
In a large bowl, whisk together flour and confectioners' sugar. Add egg whites, vanilla, and almond extract, and whisk until smooth, about 2 minutes. Whisk in melted butter until blended and batter is smooth and shiny.
Using a scant tablespoon of batter for each cookie, form six 3-4 inch rounds on a prepared baking sheet, spreading them with a narrow, thin offset metal spatula and spacing them about three inches apart. The batter will look translucent and the parchment will show through in some places. Scatter the cookies with slivered almonds. Bake cookies until they have a border that is evenly brown, but the center remains light, 6-8 minutes.
Remove cookies from the oven, and with the help of a thin metal spatula, immediately lift warm cookies from the baking sheet and rest on a rolling pin or wine bottle, making sure they do not touch.
When cookies are firm and slightly cooled, remove from rolling pin and allow to cool completely on a baking rack. Repeat with remaining batter. Store at room temperature in an airtight container for up to two days.
Makes 18-24 cookies
Wednesday, March 7, 2012
Blueberry Muffins
I have a personal gripe with most muffin recipes. By design, muffins are supposed to be an easy quick bread. They are often referred to as the "1-bowl" recipe. And yet, so many muffin recipes require a stand mixer of all things. Whenever a muffin recipe has directions that begin with "cream the butter..." or "combine the wet ingredients in the bowl of a stand mixer..." I tend to look the other way. It's not that those recipes aren't any good, it's the fact that muffins are supposed to be a quick, simple, throw together food that makes a great grab-and-go breakfast, not a delicate sit-down cake. Unfortunately, the "muffins" you find in coffee shops these days are - more often than not - heavy, overly sweet confections better found in a cheap bakery. Not that I'm complaining, or anything.
So when a dear friend of mine gave me a container of blueberries the other day (because she had bought too many...darn!), I was immediately drawn to whipping up a batch of muffins. The problem is, I just didn't want a complicated, heavy, or overly sweet recipe. I wanted something light and delicate without being, well, cakey. And I wanted it to be simple. One, two bowls, tops. And I wanted to mix it with a spoon. Not that I don't love my Kitchen-Aid, because I do, I just wanted to giver her a rest...she works very hard as it is.
So there I went on a quest for simple, hand-stirred blueberry muffins. You would be surprised at how many recipes I read through before finding one that held promise. You won't be surprised that the promising recipe came from America's Test Kitchen. Goodness, I love those guys. I wasn't a fan of the high fat content in their muffin (much as I'm sure it would taste delicious!), but I was sincerely intrigued by their mixing method (all by hand, of course). And oh, they were wonderful. So of course, the next time you have blueberries...or raspberries (yum!) be sure to check these out.
Blueberry Muffins
Adapted from Baking Illustrated
Note: the original recipe claims to get 12 muffins, but I got 18 with regular-sized muffin tins filled 3/4 of the way with batter.
2 cups all-purpose flour
1 tablespoon baking powder
1/2 teaspoon salt
1 large egg
1 cup sugar
4 tablespoons butter, melted and cooled slightly
1 1/4 cups plain yogurt
1 1/2 cups fresh or frozen blueberries
Adjust oven rack to middle position and heat to 350 degrees F. Grease a standard muffin tin or fill with muffin paper liners.
Whisk flour, baking powder, and salt in a small bowl and set aside. Whisk the egg in a medium bowl until well-combined and light colored, about 20 seconds. Add sugar to egg mixture and whisk vigorously until thick and homogenous, about 30 seconds; add melted butter in three additions, whisking to combine after each addition. Add yogurt in two additions, whisking just to combine. Add dry ingredients and fold in with a spatula. Do not over-mix. Add berries all at once, and fold into final mixture until evenly distributed.
Fill each muffin cup 3/4 of the way with batter. Bake until muffins are golden brown and a toothpick inserted comes out clean, 25 to 30 minutes. Let muffins cool on wire rack before eating. Muffins can be stored in an airtight container at room temperature, however, they taste the best on the first day.
Friday, February 24, 2012
Matcha Green Tea Shortbread Cookies
So when I first stumbled across a green tea cake recipe, I was definitely intrigued. The problem is, I'm just not that much of a cake person. It always looks pretty. I'm just not that into the idea of a huge slice of cake on a random Wednesday. And I never feel quite justified in making a cake for anything other than a birthday or party. And even then, I am usually more inclined to make a tart, a pie, or some other completely off the wall dessert before I think of making a cake. Let's just say it's not that high on my dessert-making list. I can, however, get behind cookies. Anytime, anywhere. The versatility of a cookie is endless. And there is something utterly delightful about the idea of a plate of cookies and cups of tea shared between friends. I can definitely do that on a random Wednesday.
So I started hunting for other Matcha recipes. It is now time for me to rather meekly admit (if you haven't already gathered) that I am very ingredient-driven in my cooking. I either think of or come across some particular ingredient or other, and then spend an inordinate amount of time researching potential recipes in which to showcase that ingredient, thus subjecting my poor spouse to weeks of "apple tart, apple cake, apple challah, apple chutney...". You get the drift.
So really, what choice did I have? The concept of working with such a unique ingredient was fascinating, and besides, I got to play with tea. I have to admit: I do not like coffee. I am not particularly fond of caffeine-rich teas, either, unless they are mixed with spices or herbs. But the idea of a green tea cookie was difficult to resist. And surprisingly, there are a lot of green tea cookie recipes out there.
I finally settled on the recipe from Smitten Kitchen, which resembled a basic butter cookie with the addition of green tea powder. Now I'm sure you are probably asking the same question I did: where the heck do you find green tea powder? Per Deb's suggestion on Smitten, I first went to Whole Foods, and while they did have some, it was very expensive. I had much better luck in a Japanese import store. You may also have an easy time if you go to an actual tea shop, where you can purchase loose-leaf teas by the ounce. However you track your green tea down, please make these and enjoy them on rainy (or sunny) day for me.
Matcha Green Tea Shortbread Cookies
Adapted from Smitten Kitchen
Note that shortbread cookies are incredibly versatile. If you are not particularly interested in green tea, you can eliminate it and flavor your cookies with cinnamon, nutmeg, or any other variety of flavors.
2 cups flour
1/2 teaspoon salt
1/2 cup powdered sugar (if you want a slightly sweeter cookie, increase sugar by 2 tablespoons)
3 tablespoons unsweetened matcha green tea powder
2 sticks unsalted butter, softened
1/2 teaspoon almond extract
turbinado (raw) sugar, for rolling
Whisk dry ingredients in a bowl. In a large bowl, beat softened butter until smooth. Add the almond extract, then all of the dry ingredients. Mix on low speed until the dough is smooth and all of the flour is hydrated. The dough will begin to form clumps and you will be able to form it into a ball. Divide dough into two discs and form each into a long cylinder. Flatten the edges of the cylinder to form a rectangle, about 10 inches long. Pour about 1/4 cup of turbinado sugar onto a plate or onto a sheet of parchment paper. Roll each rectangle in the sugar, gently pressing to get the sugar to stick. Place both rectangles into the refrigerator and chill for at least 30 minutes.
Preheat the oven to 325 degrees F. Remove dough from the fridge and slice into 1/6 inch slices. Place cookies onto a cookie sheet, 1/2 inch apart, and bake 15-18 minutes, or until cookies begin to brown on the edges.
Thursday, February 16, 2012
Oatmeal Sandwich Bread
In more recent years, I have come to love the process as much as the outcome. I love watching such simple ingredients turn into such a beautiful, rustic product. There is something cathartic about working the dough, watching it transition from a rough, irregular mass to a smooth, supple ball, and later into a beautifully browned loaf.
Sometime last year, I received the book Good to the Grain, and I am ashamed to say that, while I was excited about it, I didn't really look through it. I absolutely love using whole grains, I just didn't have time. After all, there are only so many recipes you can make in a year, and I had already gotten
Just recently, I picked it up, and was delighted by the variety of grains used and the variety of recipes. And while I already have a fabulous go-to whole wheat sandwich bread recipe, I am always compelled to at least try a new one. And I was not disappointed. This bread has both a wonderful crust and crumb, slices well, and has a wonderful flavor. It is also incredibly easy, which makes it a great bread for a novice bread baker. If you are nervous about making bread, this could be a wonderful place to start.
Oatmeal Sandwich Bread
Adapted from Good to the Grain
2 1/2 teaspoons active dry yeast
2 tablespoons honey
1 tablespoon unsulphured molasses (or eliminate molasses and add one additional tablespoon honey)
2 1/2 cups whole wheat flour
2 cups bread flour
1 cup rolled oats, plus more for sprinkling
2 ounces (1/2 stick) unsalted butter, melted and cooled slightly
1 tablespoon sea salt
Add 2 cups of warm water, honey, molasses, and yeast to the bowl of a stand mixer. Stir, allowing yeast to bloom for about 5 minutes, until it begins to bubble. To autolyse, measure the flour, oats, and butter into the bowl with the yeast mixture and stir together with a wooden spoon. Cover and let stand for 30 minutes.
Attach the bowl and the bread hook to the mixer, add the salt, and mix on medium speed for 6 minutes (alternately, knead by hand until the dough is soft, tacky, and supple, about fifteen minutes). The dough should slap around the sides without sticking to them. If the dough is sticking at any time during the mixing, add a teaspoon or two of bread flour until the dough comes away from the sides of the bowl.
For the first rise, scrape the dough onto a lightly floured surface, and knead it a few times. Put the dough into a lightly oiled bowl and let rise until doubled, about one hour.
To shape the dough, scrape the dough onto a lightly floured work surface. Press down on the dough to work out any bubbles, and press the dough onto itself until it begins to spring back. Pinch the seams together tightly, and place dough into a lightly oiled loaf pan (9x5x3 inches), pressing the dough down so as to fill the pan evenly. For the second rise, cover the dough in a towel and allow to rise for 1 hour, or until the dough rises half again and puffs up barely or just over the edge of the pan. While the dough is rising, preheat the oven to 400 degrees F.
When the dough has completed its second rise, brush with water, and sprinkle with oats, if desired. Bake for 40 minutes, or until the top crust is hard and sounds hollow when tapped. Remove the loaf from the pan and cool on a baking rack, preferably for a few hours.
Thursday, February 9, 2012
Mint, Zucchini, and Rice Frittata with Feta
Most everyone I know has a go-to frittata or quiche recipe. They use this recipe whenever they need a quick dinner or a nice, easy brunch with friends. Frittatas manage to be incredibly simple while tasting delicious and looking classy. They can be dressed up or dressed down, and they are the perfect platform for whatever leftovers you might have and need to use up.
Because of this, I rarely consult a recipe for a frittata, let alone buy specific ingredients to go in one. But I saw this recipe and it really intrigued me. I had never seen mint used so abundantly in a savory dish, and I was curious how the flavors would go together. It turns out that they work incredibly well.
I know, I know you don't want to go to the store to buy specific ingredients to go in a frittata, either. But frankly, you should. Just this once. Every other time, I promise it can be an eclectic mix of unidentifiable leftovers, but this time, just try it. I promise you'll be delightfully surprised.
After all, this particular frittata is light and delicate, yet satisfying in that "wow, I actually ate something that is good for me and tastes good, too" kind of way. And it's a great go to item for that brunch you forgot about, or even a light dinner when you need something fast. Oh, and did I mention that you get to show off your awesome vegetable peeling skills?
Mint, Zucchini, and Rice Frittata with Feta
Adapted from Sunday Suppers
1 cup cooked brown basmati rice
2 Tablespoons butter
2 Tablespoons olive oil
3-4 small zucchini, sliced thinly lengthwise (I use a vegetable peeler to create zucchini ribbons)
1 medium leek, sliced into thin medallions
1/2 bunch chopped mint
6 eggs
1/4 cup heavy cream
3/4 teaspoon sea salt*
1/4 teaspoon fresh ground pepper
3/4 cup feta
Preheat oven to 400 degrees.
In a cast iron skillet saute zucchini and leeks in butter and oil until soft. Mix in the rice and mint.
Whisk eggs, cream, salt and pepper. Pour over rice mixture. Cook without stirring for 3 minutes. Add crumbled feta on top.
Transfer into oven, bake 12-15 minutes, until firm to the touch and lightly browned on top.
*Reduce amount of sea salt if you are using a particularly salty Feta.
Thursday, February 2, 2012
Citrus Olive Oil Cake
Now, if you haven't ever tried an olive oil cake, I certainly hope you try this one. They are unique and delicious, and go wonderfully with a nice cup of tea on a February afternoon. This particular cake highlights Cara Cara oranges and Meyer lemons, both of which are overflowing at the Farmer's Markets right now.
Unfortunately, I have to admit that not all olive oil cakes are made equal. I have seen several recipes that call for an extremely large volume of olive oil and a huge amount of sugar. I really enjoy this recipe because the cake is moist without being oily and sweet without cloying.
In fact, this cake stays delightfully moist for days, although I doubt that it will last that long. You will make it Thursday, and you will be looking for another excuse to make it on Sunday. It slices beautifully, and would make a great dessert after a luncheon or at a meeting. It's also just a nice item to sit on your counter for every passerby who wants to grab a snack. Whatever you make it for, you will enjoy it immensely. I definitely see this recipe slipping into your regular rotation as if it has always been there, like an old friend.
Citrus Olive Oil Cake
Adapted from Smitten Kitchen
The original recipe was for a blood orange olive oil cake. While delicious, olive oil pairs well with any kind of citrus, so feel free to use an equivalent amount of tangerines, navel oranges, or lemons.
2 cara-cara or navel oranges
1/4 cup juice from 2 Meyer lemons
1 cup sugar
1/2 cup plain yogurt
3 large eggs
2/3 cup extra virgin olive oil
1 3/4 cup all-purpose flour
1 1/2 teaspoons baking powder
1/4 teaspoon baking soda
1/4 teaspoon salt
Preheat the oven to 350 degrees F. Grease a 5x9 inch loaf pan. Grate zest from both oranges and place in bowl with sugar. Using your fingers, rub sugar and zest together until evenly distributed.
Supreme both oranges: cut off top and bottom of the fruit, and cut pith off fruit by following the curve of the fruit. Cut orange segments out of the connective membrane and break up segments into 1/4 inch pieces. Set aside.
Halve Meyer lemons and juice them, until you get a 1/4 cup of juice. Mix with 1/2 cup plain yogurt. Add yogurt mixture to sugar mixture and whist until smooth. Whisk in eggs and olive oil.
In another bowl, whisk flour, baking powder, baking soda, and salt. Gently whisk flour mixture into liquid mixture. Fold in orange segments. Pour batter into prepared pan. Bake 50-55 minutes, until golden brown and an inserted knife comes out clean. Let cook 5 minutes, invert cake, and let cool completely before serving.
Subscribe to:
Posts (Atom)